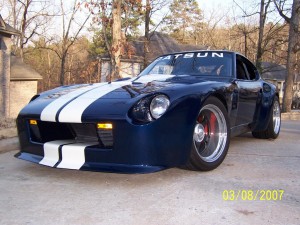
240Z Street Racer Oil Cooler Install
When I had the 289 CID motor in this car, engine oil temperature was not a problem and at times it ran cool. The installation of the 383 (stroked 351W) changed all of that. Any extended driving or repeated hard acceleration would push the engine oil temperature up to 240º, and sometimes to the end of the gauge at 250º. Water temperature appeared to be stable, and no more than a couple of degrees warmer than with the smaller motor, so it appeared I had to remedy an oil temperature problem.
Some of the options for mounting the cooler were:
1) In front of, or behind the radiator which created problems directing the oil supply hoses to and from the cooler. The design of the car has the engine radiator sealed by body/hood panels to ensure forward motion air pressure is forced through the radiator with minimal losses around it. Attaching the oil cooler to the radiator would require cut or modified body panels, extended lengths of hose, and the general dissatisfaction of having a cooler attached to the radiator through the fins using the typical plastic fasteners. The biggest issue? How effective would the cooler be on a hot radiator, or how much would a hot oil cooler decrease the effectiveness of the radiator to cool the motor with this arrangement?
2) Place the cooler in the front corner of the car, on either side, which would require opening the body panels on the front surfaces of the front end. I did not want to cut into any conspicuous portions of the exterior body panels. This option also required a lot of extra oil hose to and from the cooler. Lastly, the risk of oil cooler damage existed from trash (pebbles, etc) thrown at the cooler from the rotating tires (no wheel well panels) behind the cooler.
Neither of these options had any great appeal, so my final solution was to mount the cooler horizontally, in the base of the radiator intake scoop, under the radiator intake shrouding, immediately under the radiator. (check the drawing)

Oil cooler location shown with radiator
This option allowed a unique solution to many of my concerns. With this solution, a lot of extra hose was eliminated because from this position I could simply unhook the return hose from my remote oil filter, and attach it to the cooler without any hose or fitting modifications. This way, should something happen to the radiator, or it needed to be removed later, I could simply reconnect this hose back to the filter assembly and be done with it. The first photo shows the original (pre-cooler installation) arrangement of the oil hoses going to the remote oil filter. The top hose is the return line back to the engine, which is the hose used to insert the cooler (thank goodness it wasn’t the lower hose). Then, the lower photo shows the post-cooler install hose arrangement. Comparing the two, you can see how I was able to use the top hose, curl it under and attach it onto the cooler without any shortening or adding a new, longer hose. Why is this so important? If I should ever need to remove the cooler, I can simply remove the upper hose off the cooler and reattach it onto the filter assembly just as it was prior to this install.

The original (pre-cooler installation) arrangement of the oil hoses going to the remote oil filter.

The post-cooler install hose arrangement
This solution also provides plenty of fresh air, yet does not require any new openings on the front of the car. To provide plenty of air flow, I cut out a square in the floor of the radiator intake duct to allow the pressure from the forward motion of the car to force the air into the duct and out through the oil cooler. The under side of the body has a slight negative pressure due to the design of the front dam, which will assist air flow from the duct, down through the cooler, and out the bottom of the car. Though this opening will require cutting of a body panel, it will be much less conspicuous than if the opening was on the front of the body. Check out the photos below:

The opening for the radiator (and new oil cooler)

The duct floor, under the car, with outline of the oil cooler location
Once the location of the opening was determineed, I cut and trimmed the opening to match the cooler size and proceeded to mount the cooler.The last concern I had about the location of the cooler was the actual method of mounting. If you’ve ever driven a car with the hood off and watched hoses and wiring move around as the car tansverses bumps and curves, then you’ll immediately recognize that a rigidly mounted part is essential. This location for the cooler allowed me to fabricate a mounting system that will hold up to any challenge. I was able to weld 1/8″ tabs onto the lower core support to hold one side of the cooler (theaded for four 1/4″ bolts, and fabricate an aluminum angle bracket that would bolt onto the steel tube body extenders on the other side of the cooler. Below are photos of the cooler mounting.
The aluminum bracket attached to the cooler, the cut out hole shown from underneath and the entire assembly mounted under the hole.


Since this installation, I’ve driven the car as sustained moderate speeds (70-80 mph) during 101º temperature weather (no telling what the air temperature was just above the pavement), and the max temperature was 209º verses the pre-cooler temperatures of 245º-250º.


You have taken one of my favorite affordable sports cars of all time and made it amazing. Your tech info is greatly appreciated.
Thanks, Chip.