Ford Falcon Shelby Drop How-To: Handle it!
Drop’s Good Enough for Shelby are Great for Me!
Well, I finally got it done! After tons research, probably too much, and asking around about what’s commonly known as the “Shelby Drop”, if braved the Arizona summer and dropped my 1963 Ford Falcon wagon. Wish I could tell you how it handles, but it’s still a project.
Why the Shelby Drop? To find out, I did some checking in with my Falcon and Mustang buddies at Fordsix.com. Fordsix.com’s a great place to learn about all kinds of six cylinder engines, as well as the cars and trucks that use them. There’s folks from all over the world helping out…
The main benefits of the Shelby Drop may not be what you think… it does lower the ride height (maybe up to 5/8″), just a little, but the biggest advantages are:
- Improved suspension geometry
- Improved body roll (resistance to roll)
- A higher tendency to oversteer instead of understeer as designed by Ford
- Better use of slightly wider, better constructed modern radials
There’s quite a bit of info out there, mostly for Mustangs, to look over. Check out these if you’re still on the fence:
Mustang Barn info – Including alignment specs for after
DazeCars info
JoesFalcon website
Funny to find out that the “Shelby” drop was designed by a dude named Klaus Arning, a Ford suspension engineer, not the late, great Caroll Shelby.
Here’s how I did it. Not a tough job, really… all you need is:
- A spring compressor – especially one for large coil springs (or improvise like I did!)
- 17/32″ drill bit
- Template for your vehicle (1963 Falcons are 1″ down and 1/8″ towards the back of the car)
Let’s get started on the Shelby Drop!
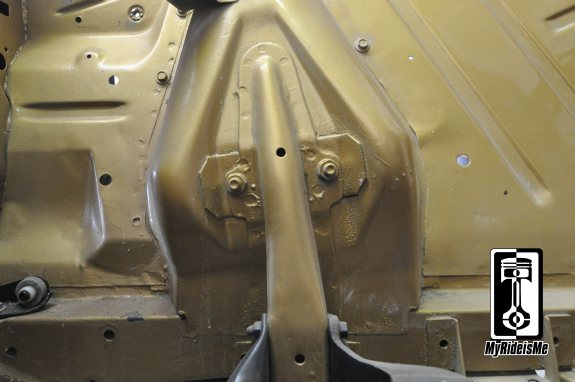
This is what I started with. Everything stock, in stock location. 1 inch down on the rear bolt looks like it'll be close to missing the extra steel to reinforce the mount
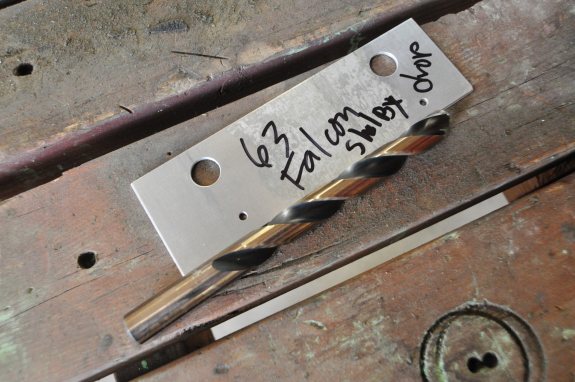
Well, here's most of the tools you'll need. A 17/32" drill bit, preferably sharp! And the template. Look closely and you can see the smaller hole I used to center-punch the location for the new holes.
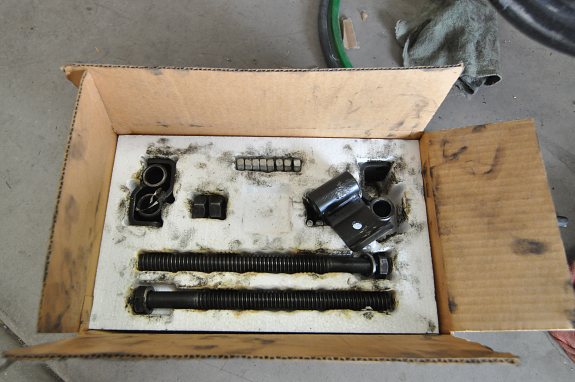
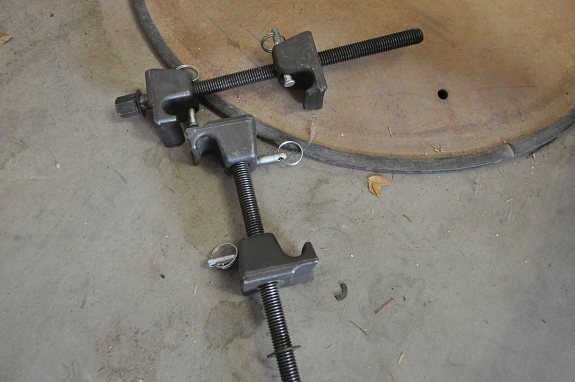
Both of these spring compressors were NOT what I needed. Both of these are for strut springs. I’ve never changed struts before, but I guess you can take the strut and spring OUT of the car, then use these tools to collapse the spring. That doesn’t work at all when the giant spring is caged inside like on old Fords. I couldn’t make these work as-is. I had to improvise some! Here’s what I did:
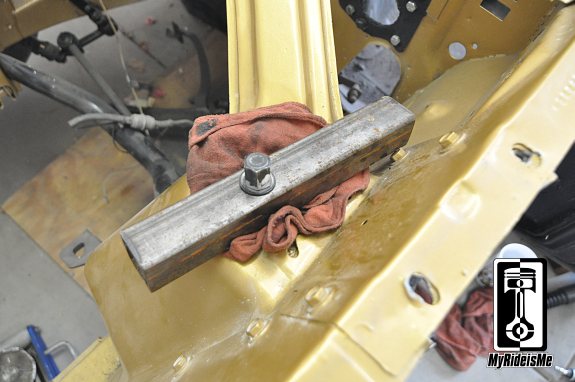
On the first side, I was able to hook up the spring compressor on the right above to the coil. I started turning and the spring sorta cooperated. This is just a piece of steel I had laying around with a hole drilled to size.
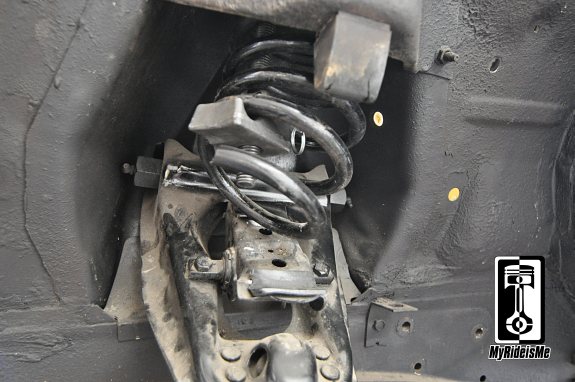
As you can see, the spring collapsed a bit sideways, but still, I had it out of the way enough to disconnect the upper control arm and slide it out of the way. As you can see, the fenders are NOT there. If they were, this may have still be possible, but you would be ducking in and out of the wheel well alot.
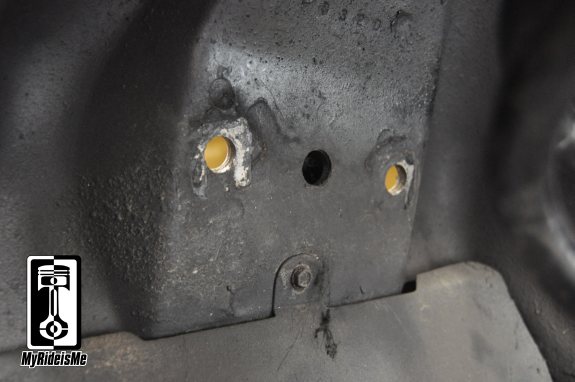
Before drilling. You can see the outline of a shim clearly on the left.
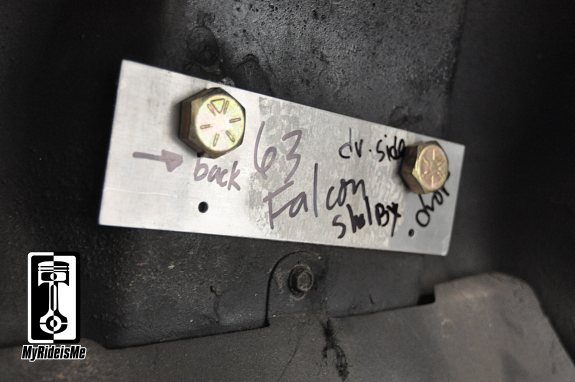
I insert the template using bolts that were the same size as what's used on the upper A-frame. A quick center-punch and the template's work was done! I guess you could have measured this, but the template sure made it easy.
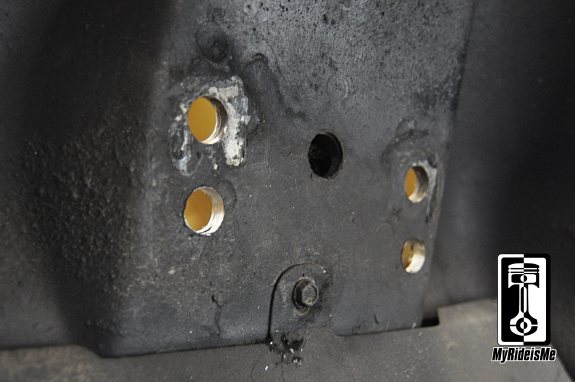
There you have it! Two new holes down 1" and back 1/8". Can you see it? I can feel'er handling better already!
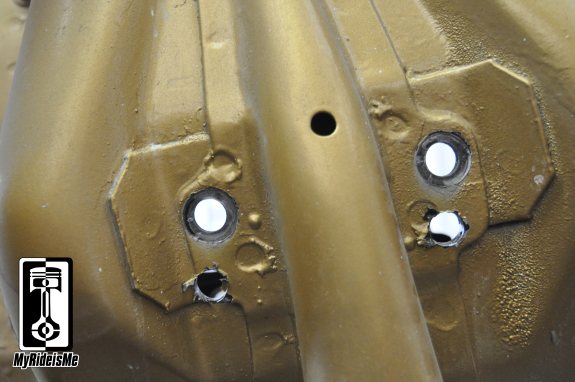
Here's what it looked like on the inside. I just barely made it onto the reinforcement. I think this will be OK, especially since this is no race car.
After drilling the holes, I slipped the A-frame back in and tightened back up. There was a little slop in my template, or more likely the way I drilled it because the A-frame resisted going back in. Some of that was caused by having it still contected to the lower arm. I just wanted to if I could do this without taking everything apart, and you can!
Any questions about what I did, or, if you want to borrow my template, leave a comment and I’ll follow-up ASAP.
Look for more updates soon or keep following this thread: 1963 Ford Falcon Wagon Build, especially when I let you know how well she handles!


I have a 1962 comet, same as this falcon. I removed all reinforcing so nothing was left on fender except the single layer of fender sheet metal. Used a spot weld drill for this operation. Then I replaced the area in question with 3/16″ plate covering entire rectangular area & also going up spring tower. (note: I trimmed the support loose above the engine mount @ an angle so I did not have to disturb. I welded a plate over top of engine mount that ties into upper reinforcement. This also gives a little more room for changing spark plugs, etc). Then I used a piece of 1 1/2″ square tubing,cut in shape of a long triangle, & welded it in place of the original horizontal tower brace that had been removed. This piece was fit to the engine mount area, but not all the way to the edge & then was wedged to bend slightly to conform to spring tower. Result; slightly more room in engine compartment, stronger more rigid structure & lots of room for “shelby drop”.