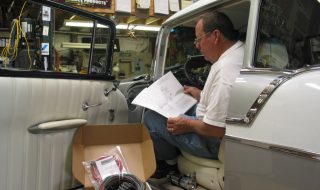
By Dennis Overholser Get the step-by-step as Jim Whittenburg of Custom Auto Wiring installs Painless Performance Product's 18-circuit universal wiring kit (#10202) into Roc Strickland's 1956 Belair. Page 1: Getting Started Removing old wiring Page 2: Layout the new wiring harness Start routing wires Mounting the fuse block Ignition Switch wiring Page 3: Light switch wiring Turn signal wiring Dakota Digital Dash wiring Tail lights wiring Page 4: Head and turn signal wiring Engine compartment wiring Final Test Jim sits in the 56 and refreshes himself on the installation instructions furnished in the Painless wiring kit. Even though he has installed several over the years, he always checks for improvements added to the manual. When doing any type of wiring repair or installation the first thing to do is disconnect the battery for safety. Jim has a plan and he likes to remove any accessory that might be in the way when routing the wires. Here he removing the air cleaner for better engine access. For better access to the under dash, the seat and fire extinguisher will be removed. John Roberts came by just in time to help...
Please Support Our Friends & Sponsors
Newest Stories:
- Vintage TorqueFest 2014 — Dubuque, Iowa Fairgrounds May 2 – 4 Hot Rods Driven Hard… The Way It Was Intended!!
- Vintage TorqueFest 2014, May 2-4 in Dubuque, Iowa
- 1956 Ford F100 – Dual Hemi’s Just in Case He Needs to Pass!
- 1947 International Pickup – 390 FE Big Block Powered Hauler
- 1929 Ford Coupe – Blown and Bad Model A Hemi Hot Rod
- 1930 Ford Coupe- Winter Dream Model A Hot Rod
- 1932 Ford Roadster – The Perfect Deuce Hot Rod in 22 Pictures
- 2014 Detroit Autorama Video Wrap-ups from Two-Lane Blacktop
- John Force Racing Between Rounds – Fire in the Hole!
- Brittany Force Ready, Set, Race – Beating the Champ and Flip Phones
